Wednesday, December 28, 2011

Korean Ginseng Chicken Soup (Samgyetang) 韓式人蔘雞湯


Ingredients:
Whole Chicken-1 medium small size
Dates-10
American Fresh Ginseng- 4 small ones or two big ones. (Cut off the ginseng roots at the bottom. Korean's believed that if it's not removed, it will give you a fever. You can also use the dried ones. Be careful what type of ginseng you use. American ginseng can be eaten in all seasons. Whereas Korean ginseng in traditional herbal medicine, is considered as "hot". It's suggested to be only used in the Winter.)
Green Onion-1 (Chopped them into small thin slices.)
Garlic-20
Sweet Rice-1/4 cup of sweet rice (Soak in water for 1 hr first.)

Method:
1. Boil a pot of hot water and put the chicken in. When the chicken changes color outside, take it out.
(This is the cleaning process.)
2. Put all the dates, ginseng, garlic and sweet rice inside of the chicken.
3. Prepare another pot of boiled water. Put the chicken in and add the rest of the ingredients, except green onion.
4. When it starts to boil, turn it to medium low heat and cook for 1 hr.

(When it's done, use a pair of chopsticks to break the chicken from the middle. Spray green onions on top and start eating!)

5. Serve (or you can let it cool down and refrigerate it first. The next day you will see the fat on top. Just scoop them out. It will become a healthy low fat chicken ginseng soup.)

*Benefit of this soup:
American Ginseng
The taste of gingseng is a bit bitter. If you don't like it, drinking the soup can get same benefits. Ginseng helps to boost the immune system, lower blood sugar levels, inhibit cancerous tumor growth and neurological benefits. Details please check http://www.livestrong.com/article/118223-benefits-wild-american-ginseng/

Red Dates:
Help to strengthen the functions of heart and lung, as well as nourish the stomach and spleen.

Sunday, October 23, 2011

Fish & Chips (Sweet Potato Fries)

Fried Sweet Potato Ingredients:
Sweet potato-2 medium size
Ice cold water
Cinnamon powder-1/2 teaspoon
Salt/1/2 teaspoon

Method:
1. Cut sweet potato into 1/2 inch size thick slices. You can either peel them or not.
2. Place chopped sweet potatoes into ice cold water for 30 mins. (This is to prevent them from sticking together when frying.)
3. Dry sweet potatoes with paper towels.
4. Preheat the oil to 375F. Fry them at 375F for 5 mins.
5. Take them out of the fryer and lie them on top of dry paper towels. So that the oil will get absorbed.
6. When serving add cinnamon powder and salt.

Fried Fish Ingredients:
Sole-4 pieces (bone and skinless. I got mine from Costco.)
Frying powder-2/3 cup (I used the Club House brand. Check the instruction from the package, each brand may differ.)
Water-1/3 cup

Method:
1. Mix Frying powder with water.
2. Preheat oil to 320F.
3. Dip the fish with frying powder mixture.
4. Fry them for 6 mins.
5. Take them out of the fryer and lie them on top of dry paper towels. So that the oil will get absorbed.
6. Serve with ketchup.

Tomato Avocado Salad

Ingredients:
Avocado-2
Tomato-2 big ones
Onion-half of a small one
Lemon-half
Salt-1/2 tsp.
Black Pepper-1/2 tsp.

Method:
1. Cut avocado into half and use a spoon to remove them from the skin. The other side with the seed, you can either use a knife or spoon to get it out. Then, cut it into small pieces.

2. Cut tomato into pieces. Don't cut them too small. So when you mix them together later, it won't be liquidity.

3. Chop onion into small chunks.

4. Put all the chopped ingredients into a big bowl. Squeeze lemon into the bowl. Add salt and pepper to taste.

5. Serve.

*Benefit of this dish:
Tomatoes are well known for containing considerable amounts of lycopene, a type of antioxidant which the body doesn't produce. Research suggests that lycopene is useful in preventing and fighting many types of cancer.

Avocado contains is good fat (much healthier than butter and even olive oil!), and it makes you feel fuller for longer. So in fact, avocados can make you lose weight as they satiate your hunger which means you will avoid snacking between meals. Avocados also contain vitamin B6, which plays a key role in creating haemoglobin, maintaining healthy teeth and gums, and keeping up the nervous system. Avocados are rich in copper and iron, key minerals in creating antioxidant enzymes.

Onions help to increase the HDL cholesterol in the blood, especially when they are eaten in their raw state. Onions also help to decrease the bad cholesterol or LDL in the blood and they increase the ability of the blood to dissolve blood clots. Onions are excellent at decreasing the risk inherent in developing diabetes and help to fight off the bacteria that are responsible for causing many infections in the human body. Onions decrease the risk of many different types of cancers. A compound known as quercetin has been discovered in onions and this compound is extremely powerful when it comes to fighting cancer and is an excellent antioxidant

Sunday, September 25, 2011

No-knead Whole Wheat Cinnamon Raisin Bread

Ingredients #1:
3 ½ cups or 375g of all purpose flour
1 cup or 120g of  whole wheat flour
(If you want to make it more healthy, you can do 50% of all purpose flour and 50% of whole wheat flour. )
2 (10g) teaspoons of sea salt
2 (6g) teaspoon of dry yeast
½ cup of warm water
¾ cups of milk, brought to a boil and cooled
3 (42g)tablespoons of melted butter
3 (37g) tablespoons of white sugar
1 egg room temperature

Ingredients#2:
1 cup of raisins
2 ½ teaspoon of ground cinnamon

Method:
1. Mix all the dried ingredients from ingredients #1.
2. ¾ cups of milk, brought to a boil and add butter. Mix it well and let it cool down.
3. Mix step 1&2. Continue to add 1 egg.
4. Slowly add 1/2 cup of warm water. Mix them well until you don't see the flour anymore.
When you see that it's sticky, it means it's done.
5. Prepare a container. Place the dough in the container and cover the lid. Let it rise for 12-16 hrs.
(I normally do this process the night before I go to bed. )
6. Add raisins and cinnamon powder into the dough. Mix them together.


7. Spray some flour on the counter and pour the dough on the counter. (Remember to spray flour to prevent it from sticking.) Make it a round shape and let it sit for 15 mins.
8. Separate the dough into two. If you are using a regular loaf baking tray, apply butter inside the tray.
Place one dough into the tray and let it rise until it's double the size.
9. Since I don't have two loaf baking trays, I use my casserole baking pot. I let the other half of the dough rise in a round bowl until it's double the size. (The rising time is hard to control. It depends on the room temperature. I did mine for 2 hrs.)
10. Heat the oven with the casserole baking pot inside at 430F. When it's heated, pour the dough into casserole baking pot and cover the lid. The other one with loaf baking tray, cover a foil and put it in the oven directly.


11. Bake them for 30 mins.
12. Remove the lid of the casserole pot and the foil. Continue to bake them for another 15 mins.
13. Remove them from the baking trays. Let them cool down.
14. Cut them into thin slices. You can eat them with, butter, cream cheese, etc..
15. Serve!

Saturday, September 24, 2011

Low Fat Lemon Cheesecake


Ingredients:
Cream Cheese 200g
Plain Yogurt 200g
Egg-2 (Room temperature)
Sugar-60g

Lemon-2 small teaspoon
All purpose flour-3 table spoons
Lemon zest-some

Method:
1. Take cream cheese out and let it sit at room temperature until it's soft.
2. Mix all ingredients, except lemon zest.
3. Prepare a baking tray, any shape that you want. Place a baking non-stick paper on the baking tray.
4. Pour the mixed ingredients into the tray.
5. Spray some lemon zest on top.
6. Bake for 360F for 40 mins.
7.Serve. Tastes best when served cool.

Monday, September 12, 2011

Tandoori Chicken


Ingredients:
Drum sticks-12
Tandoori Powder-2 Table spoons
Plain Yogurt-100g
Olive oil-4 tps.
Salt

Method:
1. Prepare a small container, add plain yogurt, olive oil and tandoori powder. Mix them all together until they become a paste. Then, add salt to taste.
2. Use a fork to poke the drum sticks. So later when you marinate, the flavour will go in and taste better!
3. Prepare a big container and mix the paste with drum sticks.
4. Put the container in the fridge for 6-8 hrs.
5. Put them in a baking tray.
6. Preheat the oven to 450 F degree.
7. Bake for 40 mins.
8. Serve.

Sunday, August 21, 2011

European Crusty Plain Bread-No Knead Bread

Ingredients:

3 cups bread flour (I like Harvest King bread flour)
1/4 teaspoon instant yeast
1 teaspoon fine table salt (or 3/4 tablespoon of kosher salt)
1 1/2 cups warm water

Method:
1. Mix all the ingredients in a bowl.
2. Slowly add water into the bowl and at the same time use your hand to mix them. Leave about 30cc of the water aside.
3. After mixing them all together, continue to add the rest of the water. Keep on mixing them until they are not watery.
4. Prepare a bowl and put the dough in there. Use a cling wrap to cover the top. Leave it inside the microwave for 12-16 hours.
5. After it's raised, you can see a lot of bubbles

6. Spread some flour on the kitchen counter. Use a spoon to get the dough out of the bowl and place it on the counter. Spread some flour on top of the dough.
7. Use a roller to get rid of the bubbles and make a big round shape. Then fold the right side to the centre and the left side to the centre.
8. Cover it with cling wrap and let it sit for another 15 mins.


9. Make the dough round. See the pic below. You press down the dough and then turn it around and press down again until it's a round shape.
10. Prepare a container and place the round shape dough in there. Cover it with a clean cloth for 1.5 hrs.


11. When there's 30 mins remaining, put the baking tray in the oven. Preheat the oven to 430F.
12. When it's preheated, take the baking tray out. Place the dough into the tray and cover with foil. (I don't have bread making containers, so this is my method. If you do, you can go ahead and use it.)
13. Bake 30 mins. Then remove the foil and continue to bake for another 10 mins or until they become dark brown colour.

14. Take them out and let it cool first.
15. Below I'll show how to cut these type of crusty bread. (This time I also made the whole wheat crusty bread. http://carolcooking.blogspot.com/2011/08/european-blueberry-and-walnut-bread-no.html)


Friday, August 12, 2011

European Blueberry and Walnut Bread-No Knead Bread


I am so glad that I know how to make this type of bread now. This is one of my favourite western breads. I love the texture of it. Outside it's crunchy and inside is soft with a bit of rum flavour. Because it's also a whole wheat bread with nuts, it's healthy for you.

Ingredients:
All purpose flour-330g (3cups)
Whole wheat flour-60g (1/2 cup)
Salt-1/4 teaspoon
Instant yeast -1/2 teaspoon
Water-300ml
Sugar-2 teaspoon
Dried Blueberry-6 teaspoon
Walnut-60 g


Method:
1. Cut walnut into small pieces.
2. Mix all the ingredients in a bowl, except the blueberry and walnut. 
3. Slowly add water into the bowl and at the same time use your hand to mix them. Leave about 30cc of the water aside.
4. After mixing them all together, continue to add the rest of the water. Keep on mixing them until they are not watery.
5. Add blueberry and walnut into the dough. Spread them evenly.
6. Prepare a bowl and put the dough in there. Use a cling wrap to cover the top. Leave it inside the microwave for 12-16 hours. (Don't let it rise for too long, otherwise it will become rum bread.)

7. After it's all raised, you can see a lot of bubbles and there will be a smell of rum. (I love this part.)
8. Spread some flour on the kitchen counter. Use a spoon to get the dough out of the bowl and place it on the counter.
9. Use a roller to make a big round shape. Then fold the right side to the centre and the left side to the centre.

10. Cover it with cling wrap and let it sit for another 15 mins.


11. Make the dough become round shape. Prepare two towels and spread the flour on top. Place the dough on a towel and spread some whole wheat flour on top. Cover with another towel (I only have one towel to cover the top, it's strongly recommend to use two. So later when you transfer the dough to the baking tray it will be much easier.  Or you can directly put the dough into the baking tray and cover it with 1 towel.)


12. Let it sit for another 1.5 hrs.

13. When there's 30 mins remaining, put the baking tray in the oven. Preheat the oven to 430F.
14. When it's preheated, take the baking tray out. Place the dough into the tray and cover with foil. (I don't have bread making containers, so this is my method. If you do, you can go ahead and use it.)
15. Bake 30 mins. Then remove the foil and continue to bake for another 10 mins or until they become dark brown colour.
16. Take them out and let it cool first. I like to eat warm bread, so after 10 mins, I started to cut them and eat them.  Love it!  Fresh warm bread with a bit of rum flavour.


17. Serve.

Thursday, August 11, 2011

Stir Fry Snap Bean and Kimchi with Pork


Ingredients:
Snap Bean-150g
Pork-200g
Kimchi-50g
Onion-20g
Green Onion-3g
Grind Ginger-3g

Seasoning:
Rice Wine-15g
Chicken Stock Powder-1 tsp. (Or adjust to your preference)

Method:
1. Cut Pork into thin slices.
2. Snap the ends by hand and remove the strings.
3. Boil a pot of hot water and cook snap bean for 1min (or until they are soft). Take them out. Rinse with cold water.
4. Chop them into small chunks.
5. Chop kimchi and onions into small pieces.
6. Heat a pan, add 1 tsp. of e.v.o.o. Cook pork and continue to add green onion and ginger.
7. Quickly stir them around. Add Snap beans and seasonings.
8. Serve.

Tuesday, July 26, 2011

Chinese Lotus Root Barley Soup

Ingredients:
Pork Bones-600g
Lotus Root-600g
Chinese Barley-50g
Red Dates-12 pcs
Green Onion-2
Ginger-3-4 slices
Water-2000cc

Normally after I buy the green onions, I wash and chop them into chunks. Store them in the freezer. Whenever I need them, I just take them out.


Seasoning Ingredients:
Rice Wine-2 big teaspoons
Salt-1 teaspoon

Method:
1. Soak the barley overnight
2.Chop the green onion into chunks
3.Wash red dates
4. Peel the skin of the lotus roots and wash them. Chop them into thin slices.

5. Boil a pot of hot water and cook the pork bones. When the pork bones change colour, take them out. Rinse them with water. (Cleaning process)

6. Cook the 2500cc water. When it's boiling, add green onion and ginger. (Make sure the water level can cover all the ingredients.)
7. Add pork bones, barely, red dates and lotus roots.
8. Cook them with high heat until they start to bubble. Turn to medium low heat. Cover the lid and cook for 1 hr or until the pork bones are soft.
9.Serve

*Benefits of this soup:
1. Red dates help to strengthen the functions of heart and lung, as well as nourish the stomach and spleen.

2. Lotus root is a good source of dietary fiber, thiamin, vitamin B6, phosphorus, potassium, copper and manganese, and a very good source of vitamin C.

3. Barely helps you maintain your overall health in the long term. These whole grains are rich in protein, vitamins, minerals and amino acids essential for our health. More importantly, barley is one of the richest sources of both soluble and insoluble fiber.

Thursday, July 14, 2011

Milky Squash Bread with Walnut 南瓜牛奶核桃麵包

Baking is like magic. You can turn the basic ingredients into something totally different. It's so amazing to see the finish product! My previous breads were all hand made. I found out that we can use a food processor to make the dough which saves a lot of time and energy. ^_^

Ingredients:
Butter-30g
Flour-295g
Mashed Squash-125g
Sugar-20g
Salt-2g
Milk-75-80g
Instant Yeast-3g
Walnut-60g

Method:
1. Prepare a food processor put flour, sugar, salt and instant yeast. Blend them for 5 seconds.

2. Add mashed squash and continue to blend. Pour small amounts at a time. ( Do it 2-3 times, don't pour it all at once. Flour needs time to absorb.)

3. Slowly add milk little by little.
4. Continue to blend them until you can make a thin layer when you stretch the dough.

5.  Get ready for fermenting. Make the dough a round shape. Prepare a container and put it in there. Spray some water on the surface of the dough. Use a cling wrap and rubber band to seal it.

6. Place it in the microwave with a cup of HOT water. Close the microwave. Let it ferment for 60 mins. If the water gets cold, replace with a hot one.

7. Use one finger to poke the center of the dough. If the dough doesn't bonce back, it means it's done. If it bonces back, let it continue to ferment for another 10 mins. and test again with your finger.

8. Spray some flour on the counter. Place the dough on top and press it to let the air out.

9. Bake walnuts at 325F for 6 mins. Chop them into small pieces.

10. Add chopped walnuts into the dough. (Fold the dough from one end to the other and press it. Continue to do it until they are evenly spread.
11. Separate them into little balls. (Use a weight to make sure they are the same size)

10.Place the little dough on a cake baking tray. (Remember to brush a layer of butter on the tray to prevent the bread from sticking.)

11. Put them into the oven or microwave with the door closed to ferment for another 60 mins.

12. 10 mins before the fermenting is done, take them out. Pre-heat the oven to 350F.

13. Brush one layer of mixed egg on top of the bread.

14. Bake them at F350 for 15-20 mins or until they turn golden colour.
15. Take them out. When they are cool, use a bread knife to cut them into pieces.

16. Serve.

Wednesday, July 13, 2011

Milky Egg Bread 奶酥麵包


Ingredients for the stuffing: (Portion 8 pcs)
Unsalted butter-80g
Icing sugar-65g
Milk Powder-80g
Egg-15g
Salt- 1 pinch

Method:
1. Place unsalted butter in room temperature until it's soft.  Filter the icing sugar. Beat the egg and use a weight to get 15g.
2. Beat unsalted butter with icing sugar until they turn white.
3.Add milk powder and salt. Continue to mix them.
4.Add egg and continue to mix. Make a round or square shape
5. Use a cling wrap to wrap it.
6. Store it in the refrigerator for at least 1 hr. Or when you are about to put them with the dough.

7. Cut them into 8 pcs. about 30g each.

Bread Ingredients:
All purpose flour-300g
Instant Yeast 3/4 teaspoon
Egg-1 ( about 50g)
Milk-140cc
Sugar-25g
Unsalted butter-30g
Salt-1/4 small teaspoon

Method:
1. Cut the butter in to small pieces. Put it in room temperature until they are soft.

2. Mix all the dry ingredients in a container, except the butter. Add the liquid ingredients. Make sure
you leave 20-30cc aside for later. (If add all the liquid at once, the flour won't be able to absorb all at once. The dough will be sticky. So it's important to leave 20-30cc aside first.) Slowly add the liquid while mixing the dough.

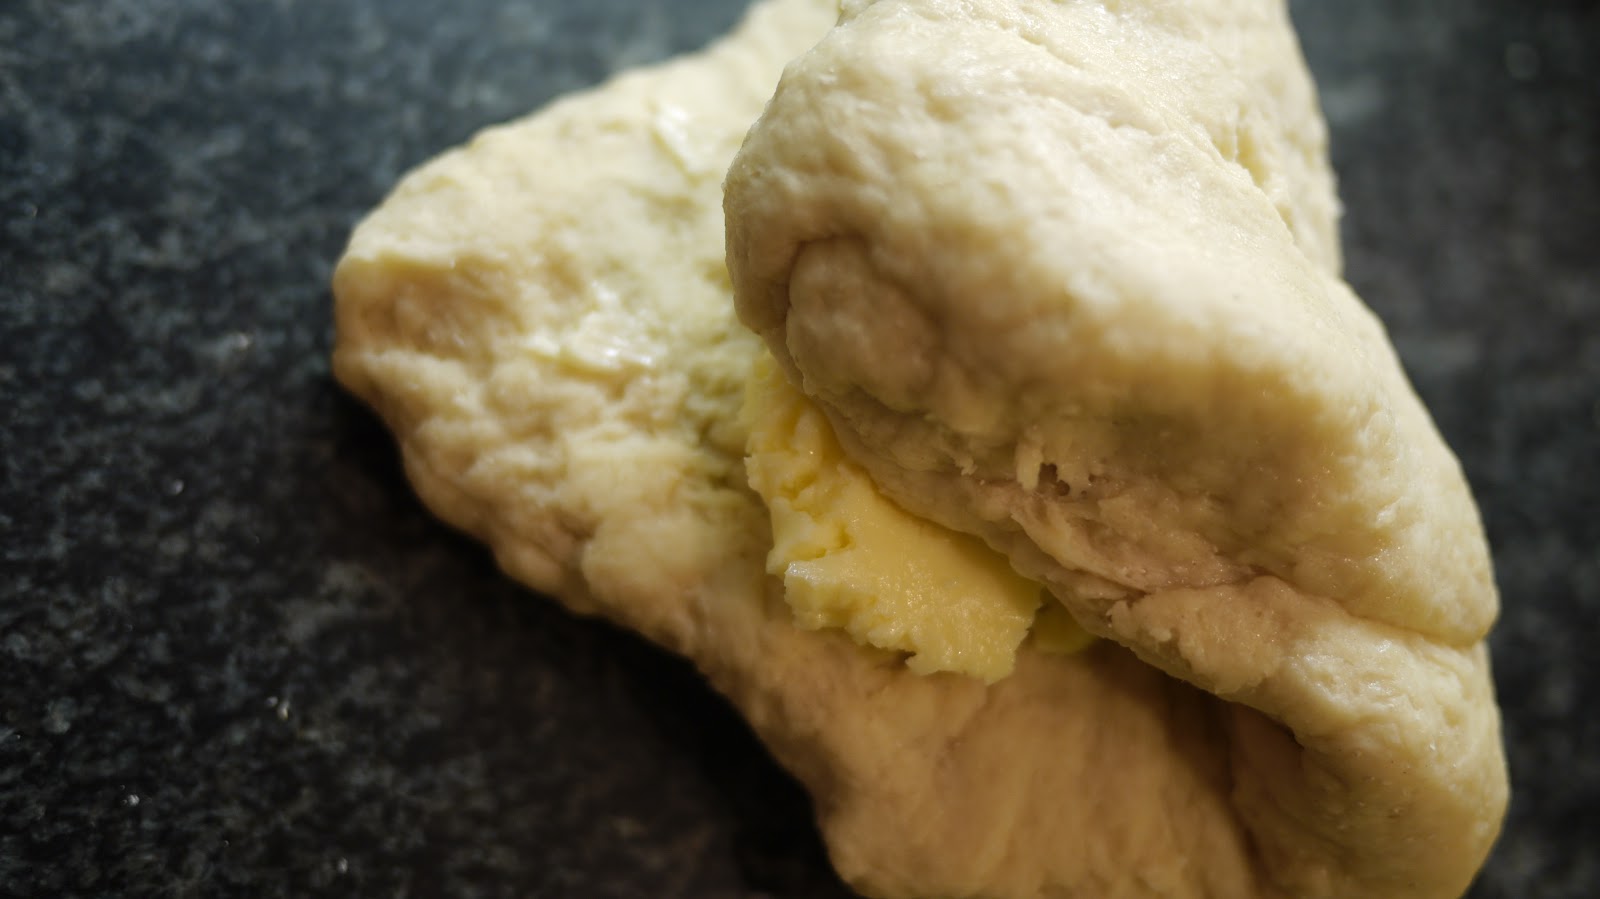
3. Continue to use your hands to mix the ingredients. When you can grab the whole dough, move it to a counter. Add butter and continue to mix.
Put butter
                          Fold it and put pressure on it. Keep on doing this until the butter is absorbed.

4. Start to hold one end of the flour and throw it to the other end. Fold it 90 degrees and do it again. Until you can make a thin layer when you stretch the dough. (Using a bread machine will be faster, if you don't have a machine, you need to do this motion about 200-250 times. It took me 30 mins for me to make a thin layer this time.)
                                                                           Throw it
                                                                             Fold it
                                                              Thin layer means it's done!

5. Make the dough a round shape. Prepare a container and put it in there. Spray some water on the surface of the dough. Use a cling wrap and rubber band to seal it.


6. Place it in the microwave with a cup of HOT water. Close the microwave. Let it ferment for 60 mins. If the water gets cold, replace with a hot one.

7. Use one finger to poke the center of the dough. If the dough doesn't bonce back, it means it's done. If it bonces back, let it continue to ferment for another 10 mins. and test again with your finger.

8. Spray some flour on the counter. Place the dough on top and press it to let the air out.

9. Separate them into 8 little balls. Each one is about 70g.

10. Use a roller to roll each dough about 12cm in diameter.

11. Put the stuffing in the middle and close it by sticking the dough  at the edges together.


                                 Make sure it's totally covered. So it won't explode when baking

12. Make sure the edges don't touch the stuffing, otherwise they won't stick.

13.  Place the finished stuffing dough on a baking tray. Put the side that you close face down.  Remember to brush a layer of butter on the tray to prevent the bread from sticking.)


14. Put them into the oven with the door closed to ferment for another 60 mins.

15. 10 mins before the fermenting is done, take them out. Pre-heat the oven to 350F.

16. Brush one layer of mixed egg on top of the bread. Spray some white sesame for decoration.

17. Bake them at 350F for 15-20 mins or until they turn golden colour.
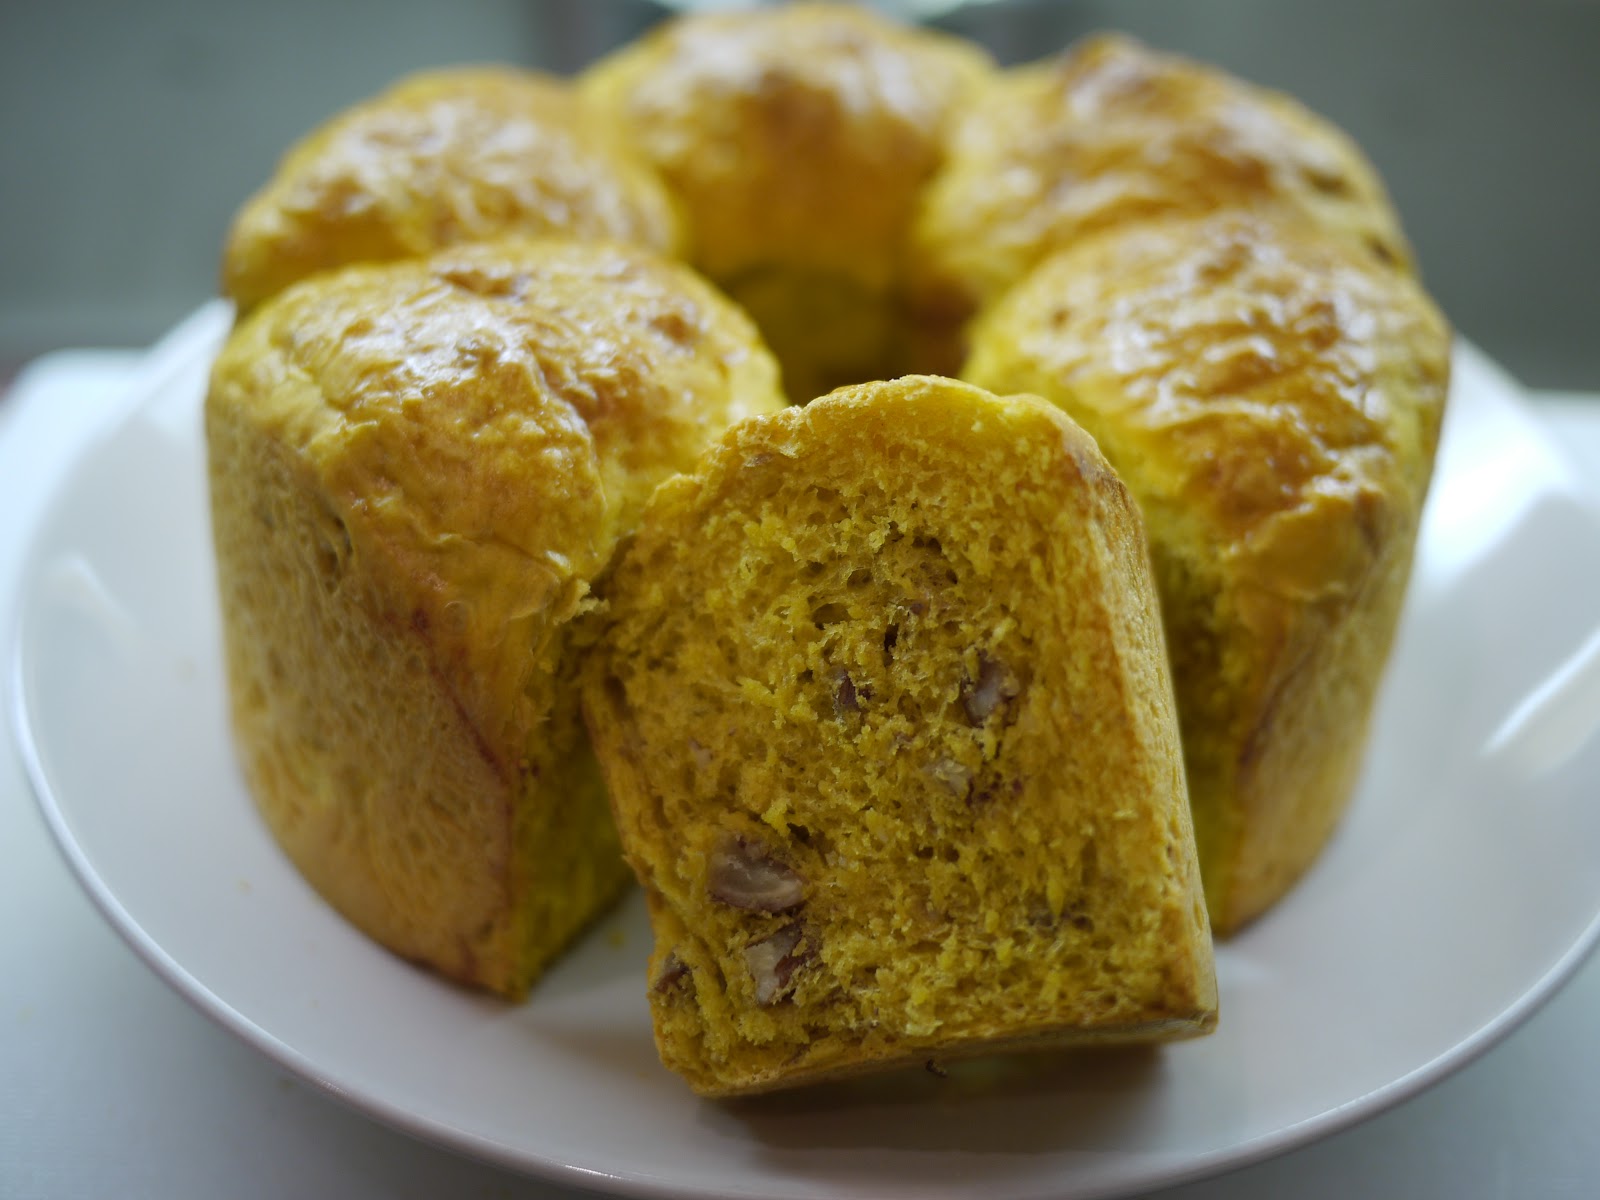
18. Done